

How To Fix Braun Electric Toothbrush
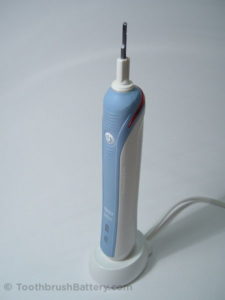
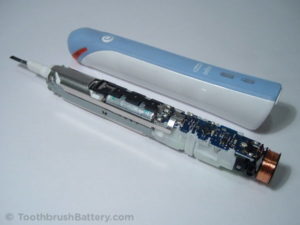
This guide will take you step by step through how to dismantle the Braun Oral-B Professional Care Type 3756 electric toothbrush and replace the battery. The tutorial is based on the Type 3756 toothbrush but also applies to Type 3754 toothbrushes. These include the Professional Care, PRO and TriZone 600, 1000, 2000 and 3000 model names, and others. The type number of your toothbrush is marked on the bottom of the handle.

For other toothbrush models and type numbers the battery replacement procedure is slightly different so please see our other guides to toothbrush battery replacement instead.
The basic method is:
- Dismantle handle
- Desolder old battery and other connections from PCB
- Remove charging coil, pressure warning light, pressure switch, PCB and battery
- Replace battery
- Reassemble PCB and other parts
- Solder in connections for parts and new battery
- Reassemble handle
This is documented in detail below along with lots of pictures. Click on any picture to enlarge it.
Video
We have also created a video from this guide to Braun Oral-B Professional Care Type 3754/3756 battery replacement here, which you can watch below.
Disclaimer
This guide is for educational purposes only and is offered without guarantee or liability. For professional use only. Any act carried out by yourself is entirely at your own risk. Any damage to yourself, your toothbrush or anything else is entirely your responsibility.
Tools / Parts / Equipment
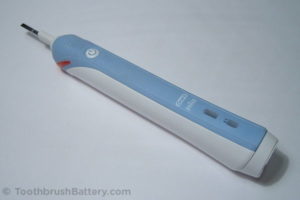
- Braun Oral-B Professional Care toothbrush (Type 3754 or 3756)
- Original charger
- Soldering iron: Electronics grade (about 18-25 watt)
- Solder: Lead-free silver solder is great for this
- Solder sucker (also known as a desoldering pump) and/or desoldering braid/wick
- Scissors
- Craft knife e.g. scalpel, snap-off, retractable or Stanley type
- Small flat-bladed screwdriver: 2 to 4mm wide
- 10-11mm ring spanner or tool with similar sized hole
- Instant glue (e.g. superglue or other cyanoacrylate adhesive)
- Replacement battery. Either:
- Original size 42mm by 14mm 1.2V NiMH with tags (Support us by buying from ToothbrushBattery.com here)
- Or upgrade to 49mm by 14mm 1.2V NiMH by modifying your brush as shown. (Support us by buying from ToothbrushBattery.com here)
How-To
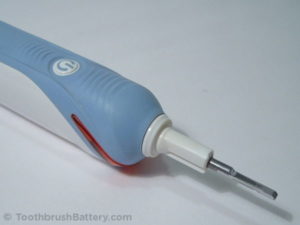
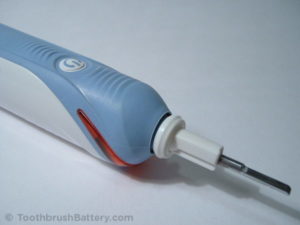
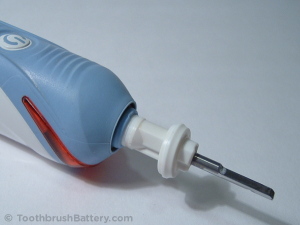
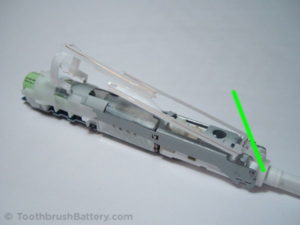
To start off, remove any brush heads from the top of the handle. Stand the toothbrush tip-first in hot water (60 degrees C) for 5 minutes to soften the plastic and make the ring easier to remove. Use the screwdriver to pry off the plastic ring from around the shaft. Note that the ring is stepped so you might need to press down into the soft coloured surrounding material to lever the ring from underneath. Alternatively you can use pliers with tape inside the jaws to stop them marking the ring.
Put the brush on its charger.
Holding the charger and the toothbrush gently bend the handle backwards so that the base starts to lever open. Standing this end of the brush in hot water for 5 minutes before bending it back will help to soften the plastic and will make the clip release more easily and be less likely to break.
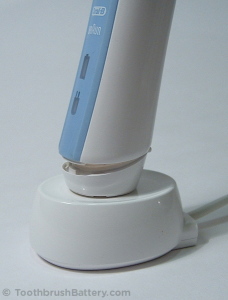

Remove the handle from the charger and the base of the handle should come off. The spring might fall out so don't lose it!

At this point you might realise that you have fallen victim to Braun's designed-in obsolescence and non-repairability if the plastic tab at the front of the base breaks off. This makes it more difficult for the toothbrush to be repaired (see below.)
Don't worry if this breaks off as we can use glue at reassembly time.
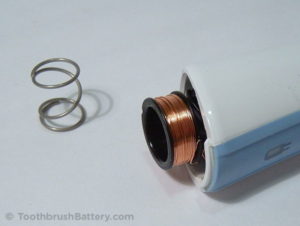
If it hasn't already fallen out remove the spring from inside the coil in base of the handle and put it somewhere safe.
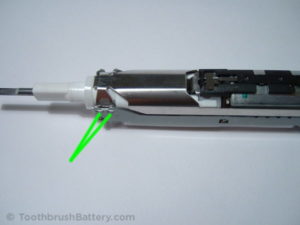
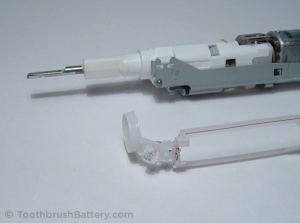
Remove the inner workings of the toothbrush by pushing the shaft in from the top.

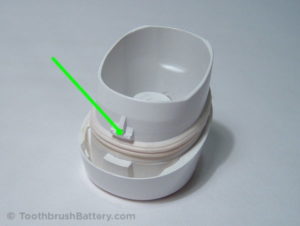
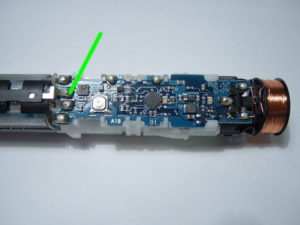
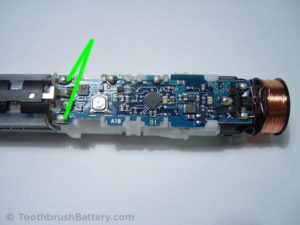
The first piece to remove from the internal assembly is the power switch plate. This is clipped in on both sides at the top of the brush, see the arrows below. Carefully unclip it from one side, then the other:
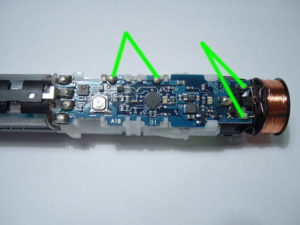
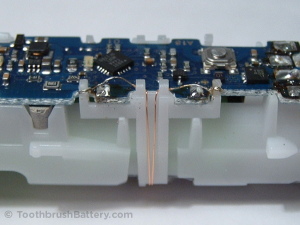
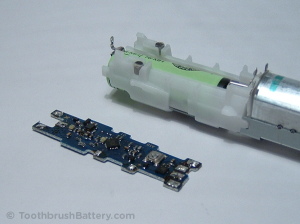
Time to get your soldering iron warmed up now! Starting with the negative one (nearest the coil of copper wire), use the soldering iron and desolder pump to carefully desolder the two battery terminals on the circuit board (arrowed below, positive on the left and negative on the right) and bend the metal tabs vertical and away from the board with a knife so there is no solder left joining the solder tag to the board. Desoldering braid might also be useful for this.
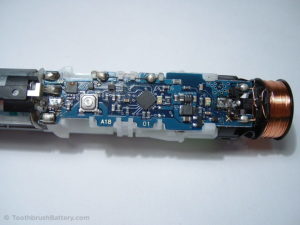
If fitted, locate the solder point for the pressure warning switch (arrowed below) and desolder it. Then unclip the switch and put it to one side.
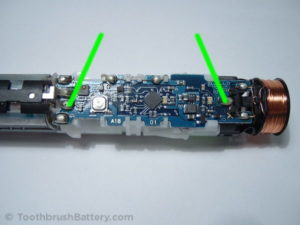
Locate the two solder points for the motor (arrowed below) and desolder them, bending the tags upright with a knife so they are disconnected from the circuit board.
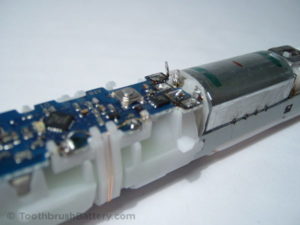
Then it's on to the copper wire solder points for the charging coil (arrowed below, right) and the pressure warning light (arrowed below, left). Carefully desolder these and lift the wires away from the circuit board trying not to melt the plastic around them.
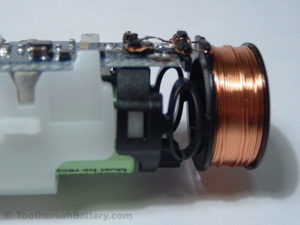
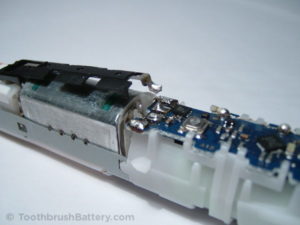
Using the screwdriver carefully press in on the white clips on both sides (one arrowed below) which hold the black coil support in place and unclip the coil, putting it to one side.
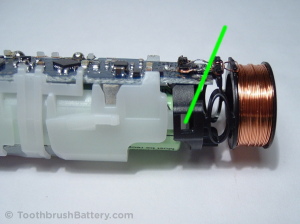
Unclip the carrier for the pressure warning light wires and gently remove the carrier from the top shaft (arrowed below) then put it to one side.
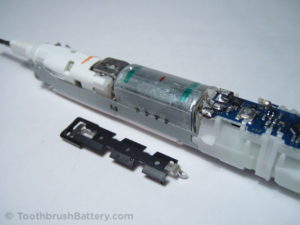
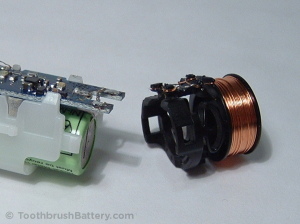
You should now be able to unclip the circuit board at the motor end of the board and slide it out.
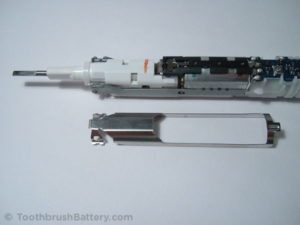
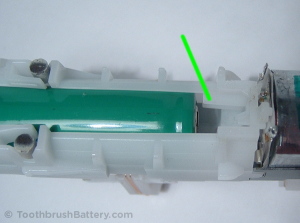
Finally, remove the battery from the toothbrush.
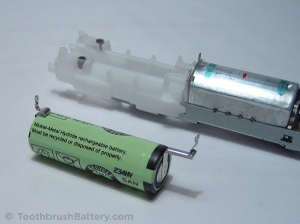
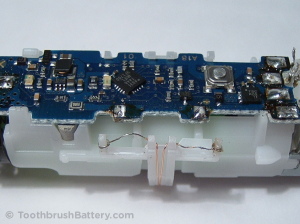
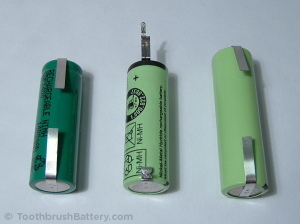
Measure your battery and if it is 42mm long you might have the option of fitting a longer battery instead. Because it is physically larger, a longer battery will have a higher electrical capacity (mAh) and will run for longer between recharges. Do you notice how the metal tag on the positive terminal extends horizontally away from the battery? Take a look at the picture below to see how the positive tag extends through some empty space inside the handle.

When the battery is temporarily replaced with a spare or even just turned around and inserted back to front you can see how the battery comes up against plastic spacing stoppers (arrowed below) which prevent it from sliding up any closer to the motor.
You now have the option to either replace the old battery with one of the same physical dimensions or modify the plastic housing to accept a longer, higher capacity 49mm battery. Please support us with writing these repair guides by buying your replacement battery through the links to our secure online shop shown. The original-sized 42mm x 14mm batteries are 1200mAh capacity and the longer 49mm x 14mm batteries are 2200mAh, over 80% higher capacity! Higher capacity means your toothbrush will run for longer before it needs recharging. See the picture below for (left to right) replacement 42mm battery, original 42mm battery and replacement 49mm battery.
Choose which option you'd like by clicking on the required link below:
Replace with original size battery
| or |
Modify and replace with longer battery
How To Fix Braun Electric Toothbrush
Source: https://toothbrushbattery.com/guides/braun-oral-b-professional-care-1000-battery-replacement/
Posted by: jantzenprolead.blogspot.com
0 Response to "How To Fix Braun Electric Toothbrush"
Post a Comment